Showing posts with label dessert. Show all posts

Thursday, May 31, 2018

BEST Chia Seed Pudding!

INGREDIENTS

  • 1 cup (240g) full-fat coconut milk
  • 1 cup (220g) almond milk (*)
  • 2 tbsp maple syrup (**)
  • Pinch of sea salt
  • Optional: 2 scoops vegan protein powder (or collagen peptides (not vegan)***)
  • 1/2 cup chia seeds
  • For vanilla: 1 tsp vanilla extract
  • For chocolate 2 tbsp cacao powder ((a little extra salt doesn’t hurt!))
  • For matcha: 1 tsp matcha powder

INSTRUCTIONS

  1. In a blender combine the coconut milk, almond milk, maple syrup, salt, and optional protein powder/collagen. Blend until combined.
  2. Add the vanilla, cacao, or matcha powder. Blend to combine.
  3. Add the chia seeds and pulse them in. Pulse briefly every 1-2 minutes until the pudding starts to thicken and the seeds remain evenly distributed as opposed to settling to the bottom. 3-4 pulses is usually enough.
  4. Transfer to a jar and refrigerate overnight (or at least 4 hours).
  5. Serve with toppings of choice and enjoy!

Wednesday, January 22, 2014

Raw Brownie Bites (healthy, delicious, and vegan!)

It's hard to believe that these are brownie bites and healthy.

It's true.
It's probably harder to believe that these actually taste good. Actually, they're delicious. I have a major sweet tooth, and these satisfy that crave. I'm also the kind of person who thinks that junk food shouldn't be healthy. This is my first exception!
Try it, you'll like it…I love them!

Healthy Delicious Brownie Bites
Yeilds: about 24 small bites
Recipe slightly adapted from paleogrubs.com
Ingredients______________________________________________________________
  • 1 1/2 cups walnuts
  • Pinch of salt
  • 1 cup pitted dates
  • 1 tsp vanilla
  • 1/3 cup unsweetened cocoa powder
  • Squirt of agave nectar, honey, or maple syrup (optional)
Instructions______________________________________________________________
  1. Add walnuts and salt to a blender or food processor. Mix until the walnuts are finely ground.
  2. Add the dates, vanilla, and cocoa powder to the blender. Add the a bit of agave nectar, honey, or maple syrup if you want a bit of extra sweetness) Mix well until everything is combined. With the blender still running, add a few drops of water at a time to make the mixture stick together.
  3. Using a spatula, transfer the mixture into a bowl. Using your hands, form small round balls, rolling in your palm. Store in an airtight container in the refrigerator for up to a week.


Enjoy and bon appetit!
Cathy

Saturday, June 29, 2013

S'MORE Cake

My dad and hubby had it made on fathers day.

I mean, you can't beat a s'more cake, you just can't. The graham cracker batter was moist and light and delicious, and the chocolate sauce it TO DIE FOR!!!! I could eat it all with a spoon. I would have, but I had the "fathers" in mind so I continued on and finished this masterpiece. Easy and so flippin' rock-my-world awesome.

So here you have it. a piece of heaven.


INGREDIENTS:


Graham Cracker Cake:

  • 1/2 cup butter, room temperature
  • 1 cup sugar
  • 3 large eggs, yolks and whites divided
  • 1 teaspoon vanilla extract
  • 2 cups graham cracker crumbs (20-22 graham crackers if you make them yourself)
  • 2 teaspoons baking powder
  • 1/4 teaspoon salt
  • 1 cup milk
Marshmallow Filling:
  • 1 (7 ounce) jar marshmallow fluff
Milk Chocolate Frosting:
  • 8 ounces milk chocolate, chopped
  • 1/4 cup cream
  • 2 Tablespoons butter, softened
  • 2 Tablespoons corn syrup
Garnish:
  • mini marshmallows
  • chocolate chips
  • graham cracker crumbs


INSTRUCTIONS:


Graham Cracker Cake:
  1. Preheat the oven to 375°. Line the bottom of two 9-inch round cake pans with parchment or wax paper. Spray each pan with cooking spray. This is magic, the cakes will come out perfectly clean! In a medium bowl, combine the graham cracker crumbs, baking powder and salt; stir together and set aside.
  2. Whisk the egg whites on medium-high speed until soft peaks form. Transfer to a separate bowl and set aside. In another bowl or in your stand mixer, cream together the butter and sugar and beat on medium speed until light and fluffy, about 2 minutes. Mix in the egg yolks until well combined. Stir in the vanilla extract.
  3. Add in the dry ingredients alternately with the milk on low speed, beginning and ending with the dry ingredients and mixing just until incorporated. Fold in about a third of the egg whites to lighten the batter. Gently fold in the remaining egg whites until completely incorporated. 
  4. Divide the batter evenly between the prepared pans. Bake the cakes for about 18-20 minutes or until a toothpick inserted in the center comes out clean. Allow the cakes to cool in the pans for about 5-10 minutes, then invert onto a wire rack, remove the parchment paper, and cool.
  5. Once the cake has cooled completely, transfer one of the cake layers to the serving platter. Carefully spread a layer of marshmallow fluff over the cake. This is the only spot that you need the fluff, so use it all if you life your fluff! Top with the remaining cake layer and refrigerate for about 1 hour or until firm.
Milk Chocolate Frosting:

  1. Combine the chocolate, cream, butter and corn syrup in a microwave safe bowl. Heat in 30 second intervals or until the chocolate has melted. Whisk the ingredients together until completely smooth. Pour frosting over the top of the chilled cake.
  2. Let frosting set slightly so that your decorations don't just run down the side. Once it has set slightly, garnish with mini marshmallows, chocolate chips, and graham cracker crumbs. Return to the refrigerator to chill until set.
  3. Cake will set up quickly, and should be stored in the refrigerator if not being served shortly after being assembled.


Bon Appétit!
Cathy

Monday, June 24, 2013

Oatmeal-Apple Chocolate Chip Muffins

I've made these 3 times already, and I keep hoping I can find the recipe online...so I thought I better get on this one and blog it already!

Delicious!


We will always make these. I usually double batch this one and freeze some for individual use whenever we want a muffin. It's worth it.


Ingredients: adapted slightly from taste of home
  • 1/2 cup butter, softened
  • 3/4 cup packed brown sugar
  • 1 egg
  • 1 cup all-purpose flour
  • 1 teaspoon baking powder
  • 1/4 teaspoon baking soda
  • 1/4 teaspoon salt
  • 3/4 cup applesauce
  • 1 cup rolled oats
  • 1/2 cup (3 ounces) semisweet chocolate chips
  1. Preheat your oven at 350. Line a muffins pan with 12 liners, or spray generously.
  2. Beat together the butter and brown sugar in a large bowl. Beat in the egg.
  3. In a separate bowl, mix the flour, baking powder, baking soda, and salt.
  4. Add half the apple sauce to the cream mixture (in step #2), mix lightly, then half the dry mixture, mix lightly, and alternate. Mix until just combined (apparently muffins should not be over-mixed).
  5. Mix in the rolled oats and the chocolate chips.
  6. Fill the muffin tins until 3/4 full. Bake for 25 minutes.
Bon Appétit!
Cathy

Friday, March 29, 2013

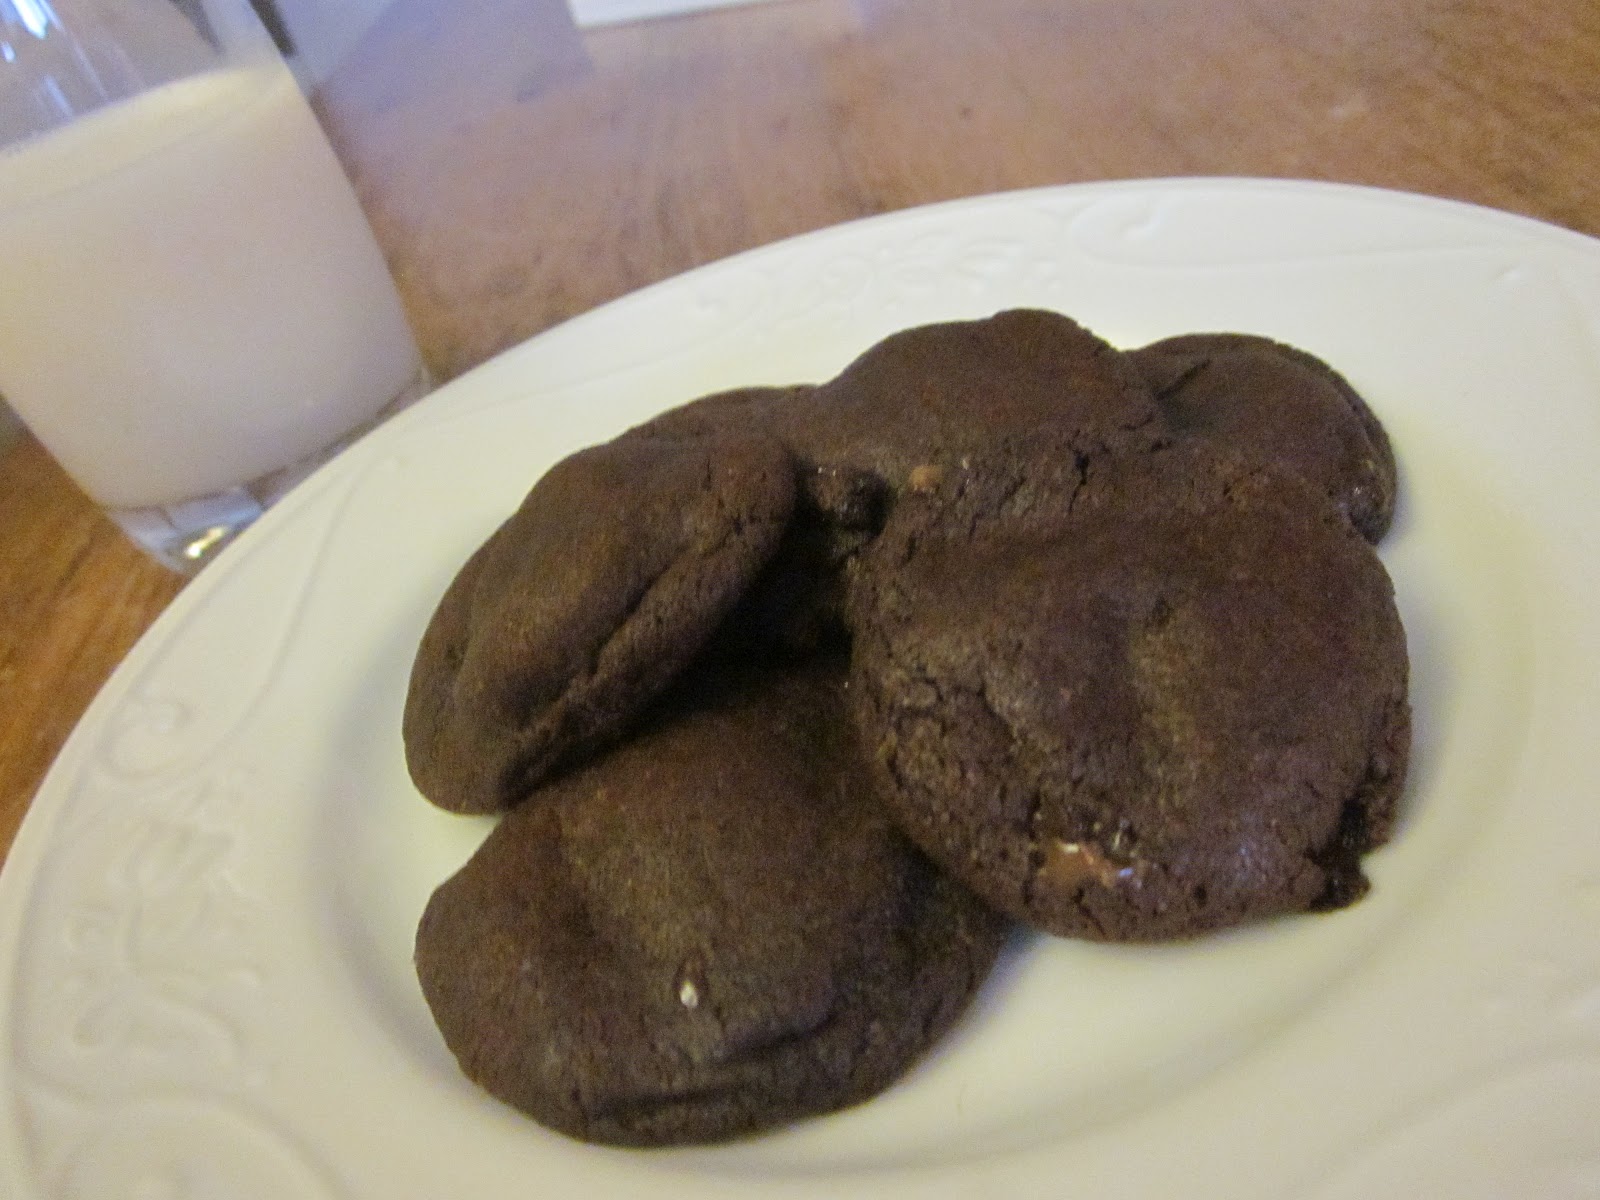
Decadent Chocolate Mini Cookies

Happy friday!

Another one of those keeper recipes. This is right up the amazing alley, along with the chocolate lava cakes and the rolo cookies!! My husband is quite in love with me these days, and the kids are crying because they want more and I won't let them...win-loose.


Adapted from key ingredient
Ingredients: (I halved the recipe the first time I made them, yes, I did 1-1/2 eggs)

  • 10 ounces (1-1/4 cup) semi sweet chocolate, chopped
  • 2 ounces (1/4 cup) unsweetened chocolate, chopped 
  • 1/4 cup butter
  • 3 eggs, room temperature
  • 1 cup sugar
  • 3/4 cup flour
  • 3/4 tsp baking powder
  • 1/4 tsp salt
Directions:
  1. In a microwave safe bowl, put the chocolate and butter in the microwave for 30 seconds. Mix, then repeat until the chocolate is just melted (it took me 3 - 30 second intervals)
  2. Let it cool a little (couple minutes), then whisk in the eggs and sugar. Add the flour, baking powder, and salt.  Cover and place in the fridge to cool for about an hour (or overnight).
  3. Set your over to 350 degrees. Let the dough sit at room temperature for 15 minutes. Line 2 baking sheets with parchment paper or a 'silpat' mat. Roll small tablespoon balls and place 20 per baking sheet (4x5) about 1 inch apart.
  4. Bake for 8 minutes (check them tho), then let them cool on the cookie sheet for about 5 minutes before picking one up or they may melt in your hands.
Mmmm, enjoy with a nice glass of milk (or three).
Cathy

Monday, March 25, 2013

Seven Layer Bars

Since I have been little I have loved these bars! They are delicious. I also love that you can always switch up some of the nuts in the recipe as well. They are quick and easy to make and people always want to come back for more!

Ingredients
  • 3 cups graham cracker crumbs
  • 1 cup unsalted butter
  • 1 can (14 oz) sweetened condensed milk
  • 1 cup butterscotch chips 
  • 1 1/2 cups chocolate chips
  • 1 cup chopped walnuts 
  • 1 1/3 cups coconut flakes

Directions

  1. Preheat oven to 350 degrees F (325 degrees F for glass baking pan). In small bowl, combine graham cracker crumbs and melted butter; mix well. Press crumb mixture firmly on bottom of 13x9-inch baking pan.
  2. Pour sweetened condensed milk evenly over crumb mixture. Layer evenly with remaining ingredients; press down firmly with fork.
  3. Bake 25 minutes or until lightly browned. Cool. Chill if desired. Cut into bars. Store covered at room temperature.

Monday, March 18, 2013

Perfect-Portion Chocolate Lava Cakes

We're back! Sorry for the long drought, we both had babies!!


So back to business.

These cakes are ridiculous.

I recommend vanilla ice cream, tho. Don't wanna overdue the chocolate, I know it sounds crazy but once you try this, you'll see what I mean! This recipe is EASY and will make you look like a pro. I made these for my mother-in-laws birthday, and everyone was begging for more. I will make these forever!!!


Perfect-Portion Chocolate Lava Cakes
Makes 12 little cakes (muffin size)
Portions adapted from Lauren's Latest.

Ingredients:
2/3 cups semi-sweet chocolate chips
1/2 cup butter
2 eggs AND
2 egg yolks (yes, 4 eggs total)
1 cup powdered sugar
6 Tbs flour


Directions:
Preheat oven to 400 degrees. 

Spray a muffin tin with non stick cooking spray and set aside. Give it a good spray, you want these to come out nice after they're done baking.

Melt chocolate and butter in a large bowl. Cool a couple minutes. Stir in eggs and egg yolks until incorporated, this cooks the eggs. Stir in powdered sugar and flour. Spoon into prepared muffin tin so batter is 1/2 of the way up. Bake 8-9 minutes or until the edges are cooked and the centers are soft. Cool 5 minutes and carefully remove from pan using a butter knife. 

Serve warm with vanilla ice cream.


Wednesday, September 26, 2012

Lemon Bars

What a great alternative to the go to chocolaty desserts. Lemon Bars!! Always a hit with people and oh-so good!! Most of the time these are ingredients that you just have laying around so it's just great to whip up when you want a yummy dessert.


Ingredients

  • 1 cup butter, softened
  • 1/2 cup white sugar
  • 2 cups all-purpose flour
  •  
  • 4 eggs
  • 1 1/2 cups white sugar
  • 1/4 cup all-purpose flour
  • lemons, juiced


Directions

  1. Preheat oven to 350 degrees F (175 degrees C).
  2. In a medium bowl, blend together softened butter, 2 cups flour and 1/2 cup sugar. Press into the bottom of an ungreased 9x13 inch pan.
  3. Bake for 15 to 20 minutes in the preheated oven, or until firm and golden. In another bowl, whisk together the remaining 1 1/2 cups sugar and 1/4 cup flour. Whisk in the eggs and lemon juice. Pour over the baked crust.
  4. Bake for an additional 20 minutes in the preheated oven. The bars will firm up as they cool. For a festive tray, make another pan using limes instead of lemons and adding a drop of green food coloring to give a very pale green. After both pans have cooled, cut into uniform 2 inch squares and arrange in a checker board fashion.

Enjoy!!
-Christy

Wednesday, September 12, 2012

Double Chocolate Rolo Cookies

When I rated this recipe in my cookbook, I rated it a 1000 out of 10. My husband thought I was the most amazing woman on earth.  They are simply delicious and because they're tiny little cookies, you eat way too many!!

And in case you care, I'm sure you all do, I am due today. Yep, today. I need a plate of these right now. They induce labor, right? I'm sure they do...

  • 2 1/2 cups flour
  • 3/4 cup cocoa
  • 1 tsp baking soda
  • 1 cup white sugar
  • 1 cup firmly packed brown sugar
  • 1 cup softened butter
  • 2 tsp vanilla
  • 2 eggs
  • 75 Rolo chocolates
  1. Mix the flour, cocoa, and baking soda.
  2. In a separate bowl, beat the sugar and butter. Add the vanilla and eggs and combine well.
  3. Add the flour mixture to the sugar mixture, and combine well. Chill cookie dough for 1 hour.
  4. Shape dough in small (about 1 1/2 tsp) around a Rolo. Make sure the Rolo is completely covered.
  5. Place on ungreased cookie sheet, and chill again for 1 hour more.
  6. Bake at 375 degrees for 7-8 minutes, then cool on wire rack.

You will LOVE these!!!
Cathy

Source: Canadian Bible Society Celebration Cookbook, Wilma King and Gwen Louiselle

Wednesday, May 23, 2012

S'more Cookie Bar

Another dessert for you guys this week! I have been seeing this dessert everywhere since I made it a few weeks ago. I feel like it's the new dessert to try out. It was super tasty and very easy to make. My favorite part was pressing the dough in the gallon sized bag (you'll see in the directions.) 


Ingredients
Source:The Girl Who Ate Everything

  • 1/2 cup butter, room temperature
  • 1/4 cup brown sugar
  • 1/2 cup sugar
  • 1 large egg
  • 1 tsp vanilla extract
  • 1 1/3 cups all purpose flour
  • 3/4 cup graham cracker crumbs (approximately 6 full graham crackers)
  • 1 tsp baking powder
  • 1/4 tsp salt
  • 2 super-sized (5 oz.) chocolate bars (e.g. Hershey’s)
  • 1 1/2 cups marshmallow creme/fluff (not melted marshmallows)


Directions
Preheat oven to 350°F. Grease an 8-inch square baking pan.
In a large bowl, cream together butter and sugar until light. Beat in egg and vanilla.
In a small bowl, whisk together flour, graham cracker crumbs, baking powder and salt. Add to butter mixture and mix at a low speed until combined. 
Divide dough in half and press half of dough into an even layer on the bottom of the prepared pan. Place chocolate bars over dough. Two 5 oz. Hershey’s bars should fit perfectly side by side, but break the chocolate (if necessary) to get it to fit in a single layer no more than 1/4 inch thick. 
Spread marshmallow fluff evenly over the chocolate layer.
Place remaining dough in a single layer on top of the fluff. This is most easily done by putting the second half of the dough in a gallon size freezer bag. Use your palms to flatten it out, and then use scissors to cut down both long sides of the bag, so it will open up book-style. Open it up carefully, and the dough will stick on one side of the bag. Then place the bag, dough side down, on the other three layers. From there peel the bag up ad spread the dough where it is uneven.
Bake for 30 to 35 minutes, until lightly browned. Cool completely before cutting into bars
Makes 16 cookie bars.


Enjoy !!
-Christy

Monday, May 21, 2012

No Bake Nutella Cheesecake

So I had this at work forever ago for Valentine's Day...Everyone LOVED it. It was seriously the best dessert I have ever had. Next time I make it though my servings will be a lot smaller. It is extremely rich!

Ingredients
Source: Croutons and Cupcakes

For the Crust

  • 12 Oreo Cookies, crushed into crumbs
  • 3 tablespoons unsalted butter, melted

For the Filling


  • 1 (8 ounce) package cream cheese, softened
  • 2/3 cup Nutella
  • 1 teaspoon pure vanilla extract
  • 1 (8 ounce) tub frozen whipped topping, thawed

For the Garnish


  • whipped topping, optional
  • chocolate shavings, optional
  • toasted, chopped hazelnuts, optional

Directions 
1. In a medium bowl, stir together the Oreo cookie crumbs and melted butter. Evenly divide the crumbs between your individual serving dishes and press into the bottoms of the dishes to form a crust layer.
2. In a large bowl, with an electric mixer, beat the cream cheese and Nutella until smooth. Add vanilla and mix to combine. Using a rubber spatula, fold in the whipped topping until well blended and no streaks remain.
3. Evenly pipe or spoon the filling into individual serving dishes. Cover with plastic wrap and refrigerate for at least 2 hours before serving.
4. If desired, garnish with additional whipped topping, chocolate shavings, and/or toasted, chopped hazelnuts.


Enjoy !!
-Christy

Saturday, May 12, 2012

Lauren's Cinnabon's--I take no credit

The picture is mine--don't let the 'one' fool you,
I ate about 3 in a row...so yummy.
Mothers Day is tomorrow! Make these...the woman/mom/friend in your life will forget about all the years past where you didn't measure up. Or just make them cause they're delicious!

So, I take no credit for what will follow. I actually use this blog as a way to document the recipes love and want to keep making. Well, of course this made the list. Lauren's Latest website should be checked out for some great recipes, I go there all the time!.


Ingredients:
for the dough-
3/4 cup warm water
2 1/4 teaspoons active dry yeast {use the fast acting kind!}
1/2 cup granulated sugar
1 teaspoon salt
1/4 cup buttermilk, at room temperature
1 egg
1/3 cup canola or vegetable oil
4 1/2-5 cups all purpose unbleached flour
for the filling-
1/2 cup softened margarine
1 1/4 cups packed light brown sugar
2 1/2 tablespoons ground cinnamon
2 tablespoons cornstarch
for the frosting-
2 oz. cream cheese, at room temperature
1/4 cup softened margarine
1 teaspoon vanilla extract
1/2 tablespoon corn syrup
1 teaspoon fresh lemon juice
1 1/4 cups powdered sugar
Directions:
  1. Making the Dough- In the bowl of a stand mixer fitted with a dough hook, pour in water, yeast and 1 tablespoon of the granulated sugar. Stir and proof 5 minutes. Once mixture looks bubbly and frothy, pour in remaining sugar and salt. Stir on low for 15-20 seconds. In a small bowl, measure buttermilk, oil and egg. Whisk ingredients together until egg is incorporated to other two ingredients. Pour contents into the water and yeast mixture. Stir another 20 seconds in the mixer. Pour 2 cups of flour into mixer and stir on low until incorporated. Sprinkle flour in by 1/4 cup increments until dough cleans the sides and bottom of the bowl. Dough should be sticky but not sticky enough to stick to your hands when touched. Once it has reached this stage, turn mixer on and knead for 5 minutes. Remove dough from bowl, grease and replace back into same mixing bowl {since it’s practically clean anyways.} Cover with plastic wrap and a dish towel. Rise 1-2 hours or until dough has doubled in size.
  2. Filling and Cutting Rolls- In a medium size bowl, stir brown sugar, cinnamon and cornstarch together until combined. Set aside. Punch down dough. Flour a large clean table liberally with flour. Lightly flour dough as well. Roll dough out to be a 20×30 rectangle {or as close to that as possible} while moving dough around to ensure it’s not sticking to your work surface. If it’s a little short or uneven, feel free to cut off the edges to even it all out. {FYI-I cut off some dough on one side and filled in a spot that needed more dough on the other side to make a more even rectangle.} Spread softened margarine over dough, being sure to go right to the edges leaving a 1-inch strip untouched on one of the longer sides of dough. Dump brown sugar mixture onto the middle of the dough and spread with your hands, creating an even layer over top of the margarine, still leaving that 1-inch strip of dough untouched. If you have any filling that falls off the sides of the dough, use a bench scraper to replace. Lightly press the sugar mixture into the margarine using a rolling pin. Roll the dough up into a tight log, finishing with the plain dough on the bottom to seal the entire thing together. Cut off the uneven ends to even out the log. Score log every 2 inches and then slice your rolls using those marks. Place into parchment paper lined, margarine greased pans. 12 into a 9×13, 3 remaining into a loaf pan, or 8×8 with the small ends. Cover pans with plastic wrap and dish towels. Let rolls rise another 1-2 hours or until they are touching and have risen almost double. My rolls always spread out more than up, so just be aware that they will most likely spread out more than up. Bake in a preheated 350 degree for 17 minutes, or until tops start to brown. Watch them carefully!!
  3. For the Frosting- While the rolls are baking, whip cream cheese and margarine together. Stir in vanilla, corn syrup and lemon juice. Scrape sides and mix again. Pour in powdered sugar and stir slowly until it starts to incorporate. Then mix on high for 5 minutes or until frosting starts to lighten in color. Scrape sides and mix again briefly. Once rolls have been removed from the oven, frost using half the amount made. Then after they have cooled a few more minutes, frost again with remaining frosting. The first frosting will melt down into the rolls and the second layer should stay put. Serve warm.

Recipe Notes: See step my step photos for more details I neglected to mention. Also, if your frosting isn’t quite ready after you pull the rolls out of the oven, cover with foil so the tops don’t dry out and get crispy.


Go here to see her detailed step by step photos...and her awesome blog!

Bon Appetit!
Cathy

Thursday, May 10, 2012

'Healthy' Carrot Cookies {Sister-in-Law Guest Post}

Photo form laurenslatest.com

" got this recipe from my friend Lauren’s website –laurenslatest.com. I switched it up at bit though. My version is slightly less healthy, but still healthy! It’s a good way to use up carrots too, I don’t know if most people have this problem, but our carrots always end up going bad before we can eat them all. These cookies are also Cat and Abi approved!"

Ingredients: 

Cookies
  • 1/3 cup coconut oil (butter would work too) 
  • 1/4 cup brown sugar
  • 1/4 cup maple syrup
  • 1 egg
  • 1/2 teaspoon vanilla
  • 1 cup grated carrot
  • 1/4 cup unbleached all purpose flour
  • 1/2 cup whole wheat flour
  • 1/2 teaspoon baking powder
  • 1/8 teaspoon baking soda
  • 1/4 teaspoon salt
  • 1/2 teaspoon cinnamon
  • 1/2 cup rolled oats
  • 1/2 cup of white chocolate chips, or as many as you want! I never measure chocolate chips.          

Glaze
  • 2 tablespoons greek yogurt
  • 3 tablespoons powdered sugar
  • 1/4 teaspoon vanilla extract
  • milk, if needed


Directions:
  1. Preheat oven to 350 degrees.  
  2. Mix coconut oil, brown sugar and maple syrup until light and fluffy. 
  3. Stir in egg, vanilla and carrot. 
  4. Mix dry ingredients separately, then mix them in (don’t over mix).
  5. Spoon cookies onto greased pan and cook for 8- 10 min, or until golden brown. 
  6. For the glaze: mix all glaze ingredients together until smooth. Add a little milk if needed- to reach a smooth drizzly consistency. Drizzle over slightly cooled cookies and serve.


Enjoy!
Brittany (Cathy's sister-in-law)

Thursday, May 3, 2012

Raisin Bran Muffins


So these are ever so slightly different from the classic raisin bran muffins with the best rating on allrecipes.com. I didn't have buttermilk, so I did a cup of milk with 1 Tbs of lemon juice incorporated into it (so that it totals 1 cup of liquid). They were delicious! I love muffins, and really wish I made them more often...so I think I might just do that.

Time: 40 minutes total
Makes: 12 muffins

  • -1 1/2 cup wheat bran
  • -1 cup milk (aprox) + 1 Tbs lemon juice (so that it equals 1 cup total)
  • -1/3 cup vegetable oil
  • -1 egg
  • -2/3 cup brown sugar
  • -1/2 teaspoon vanilla extract
  • -1 cup all-purpose flour
  • -1 teaspoon baking soda
  • -1 teaspoon baking powder
  • -1/2 teaspoon salt
  • -1/2 cup raisins
  1. Preheat your oven to 375. Line your muffin pan with liners, or spray/oil them.
  2. Mix the wheat bran and buttermilk and let it sit while you combine the other ingredients.
  3. Beat the oil, egg, brown sugar and vanilla. Once the bran and buttermilk have set for about 10 minutes, combine them.
  4. Sift together the flour, baking soda, baking powder, and salt. Add it to the wet mixture until it's just blended. Do not over mix, that's how they get dense and dry.
  5. Gently fold in the raisins.
  6. Add a scoop of batter in each tin, and bake for about 18 minutes. Start checking them at 15 minutes since all ovens vary. When your toothpick comes out clean, take them out, cool them off, and enjoy them all!

Oh these are yummy! Enjoy them.
Cathy